7/3/2026
Onboarding
How to Onboard Clients Who Hate Being Onboarded
Some clients sign the contract and then refuse to participate in onboarding. They are not being difficult. They are telling you something about your process.
Whether you're onboarding new clients, collecting documents, or building intake forms, we'll help you get organized.
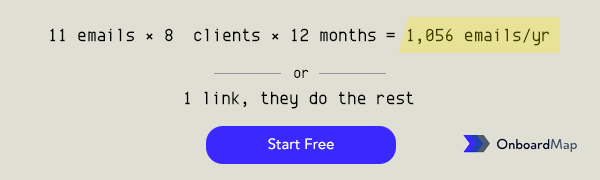
OnboardMap replaces email chaos with one link. Clients complete every step. You see progress instantly.

TLDR: The average web design project runs 2-3 weeks behind schedule, and the cause is rarely the design itself. It is the onboarding. Clients show up to kickoff calls without brand guidelines, send logos as 72px JPEGs pulled from Facebook, forget hosting credentials, and trickle in content one page at a time over six weeks. The fix is not more follow-up emails. It is a structured intake system that collects every asset, login, content file, and decision before you start designing. This article breaks down the exact 5-phase onboarding system for web designers, including what to collect, when to collect it, and how to stop being the person who chases clients for their own logo.
Every web designer has lived this timeline:
Monday: Client signs the contract. You are excited. They are excited. The project feels like it will fly.
Tuesday: You send a welcome email asking for their logo, brand colors, current site login, and a few pages of content.
Wednesday: Silence.
Thursday: You follow up. “Just checking in! Did you get a chance to gather those assets?”
Friday: They reply: “Oh, sorry! Been swamped. I’ll get to it this weekend.”
The following Monday: They send their logo. It is a 72px JPEG pulled from their Facebook profile photo.
Sound familiar? You are not alone. Web design projects are uniquely vulnerable to onboarding failures because they depend on so many client-supplied inputs before meaningful work can begin. A bookkeeper needs financial documents. A consultant needs business context. But a web designer needs brand assets, content for every page, technical credentials, third-party logins, photography, legal copy, competitive references, and a dozen decisions the client has not even thought about yet.
That is not a follow-up problem. It is an onboarding system problem. And in this guide, I will walk you through the exact system that fixes it.
Most service businesses have onboarding challenges. But web design has a specific set of conditions that make onboarding failures almost inevitable without a system.
The dependency chain is brutal. You cannot design a homepage without brand assets. You cannot build pages without content. You cannot launch without hosting credentials. Each phase depends on the one before it, and a single missing item can stall the entire project for weeks.
Clients do not know what you need. When a bookkeeper says “send me your bank statements,” clients know what that means. When a web designer says “send me your brand guidelines,” most small business clients stare at their screen and freeze. They do not have a brand guide. They do not know what file format their logo should be in. They do not realize that “content” means they need to write actual paragraphs for every single page on the site.
The emotional gap is huge. Clients sign up for a beautiful new website. In their mind, they are buying a finished product. In reality, they are signing up for a collaboration that requires hours of their own work. Nobody told them that during the sales process, and the onboarding experience is where that gap becomes painfully obvious.
Multiple stakeholders complicate everything. The person who signed the contract is often not the person who has the brand files. Or the hosting credentials. Or the authority to approve the homepage copy. Web design projects touch marketing, IT, legal, and leadership. Sometimes all at once, and nobody told them they would be involved.
This is why chasing clients for documents is the number-one complaint among web designers. It is not that clients are lazy or disorganized. It is that nobody mapped out what they need, when they need it, and why it matters.
Here is the system. Five phases, run in order, each with a clear deliverable. The goal is simple: have everything you need before you design a single page.
The golden hour after signing applies to web designers just as much as any other service business. Within 60 minutes of receiving a signed contract, your client should have three things:
This is also where you set the expectation that delays on their side delay the project timeline. Say it directly, in plain language. Clients respect clarity far more than they respect politeness that hides the truth.
Before you collect a single asset, you need the brief. This is where most web designers go wrong. They jump straight to asking for logos and content before understanding the project well enough to know whether those assets are even the right ones.
Your intake questionnaire should cover four areas:
Business Context:
Design Preferences:
Scope and Logistics:
Current State:
A solid intake questionnaire eliminates 80% of the back-and-forth that slows projects down. Send it on day one. Set a 3-day deadline to return it. If it does not come back in 3 days, your automated reminder handles the follow-up so you do not have to.
This is the phase that derails most web design projects. Here is exactly what to request, with specific instructions your clients can actually follow.
Logo files:
Brand colors:
Typography:
Photography and imagery:
Existing brand materials:
The key is being specific. Do not send a list that says “brand assets.” Send a checklist where each item has a description, a file format requirement, and an upload location. When clients know exactly what to send and exactly where to put it, they send it faster. Vague requests get vague timelines.
Content is the bottleneck that kills web design timelines. Not design revisions. Not technical bugs. Content. The words on the pages. Here is how to handle it without losing your mind.
Set expectations on day one. Tell clients immediately that every page on the website needs written content, and that the content needs to come from them. Spell out exactly which pages need copy and approximately how much text each page requires. Many clients assume you will write it. If copywriting is not in your scope, make that crystal clear before they start onboarding. Not during. Not after. Before.
Break content into manageable pieces. Do not ask for “all the website content.” That request paralyzes people. Instead, request each piece individually:
Provide fill-in-the-blank templates. Do not ask clients to “write their about page.” Give them a template: “Answer these 5 questions about your company, and I will format the responses for the page.” A guided approach gets content 3x faster than an open-ended request.
Set a hard deadline with a real consequence. Content that does not arrive by day 10 means the project design start shifts. Make this consequence clear in your welcome message and in your contract. No ambiguity. Clients procrastinate on content because nobody ever told them there was a deadline with teeth.
This phase runs alongside asset and content collection. You need these items to launch, and collecting them early avoids a scramble at the finish line.
Domain access:
Hosting credentials:
Existing site access:
Third-party integrations:
Important: Collect credentials through a secure upload system, not email. Passwords floating around in email threads are a liability for both of you. Use a client portal with secure fields, a password manager share, or a dedicated encrypted form. This is non-negotiable.
Most web design kickoff meetings are information-gathering sessions disguised as project launches. The designer spends 45 minutes asking questions they should have asked during intake. The client spends 45 minutes realizing how much homework they have ahead of them. Both parties leave with a vague sense that “real work” is still weeks away.
When you run the five phases above first, the kickoff meeting transforms. You already have the brief, the assets, the content, and the credentials. The meeting becomes:
That is a meeting worth having. And the client walks away thinking, “This person has their act together.” That impression matters more than most designers realize. As we covered in what clients secretly compare your onboarding to, your process is being benchmarked against every other professional interaction they have, from their accountant to their last Amazon order.
Even with the best system, some clients will stall. They will not send the content. They will not find their hosting login. They will disappear for a week and come back with “sorry, things got crazy.”
Here is how to handle it without becoming their project manager.
Build reminders into your process. Do not rely on yourself to follow up manually. Use automated reminders at day 3, day 5, and day 7 after each request. If you are still chasing clients for documents by hand, this is the single biggest upgrade you can make to your practice. The time savings compound with every project.
Make consequences clear and kind. “I want to make sure we hit your August 1 launch date. For that to happen, I need your homepage content by Friday. If it arrives later, the timeline shifts by the same number of days.” No passive aggression. No guilt. Just math.
Offer alternatives for common blockers. If a client cannot produce written content, offer a paid add-on for copywriting or connect them with a writer you trust. If they do not have brand guidelines, include a mini brand discovery session. Removing the obstacle is almost always faster than waiting for the client to figure it out on their own.
Know when to pause. If a client is more than two weeks late on deliverables with no communication, it is time for a direct conversation about whether the project should be put on hold. This protects your schedule, prevents the project from dragging on indefinitely, and actually helps the client by removing the guilt of an open-ended obligation.
When you do not have an onboarding system, every project carries a hidden tax. You spend hours writing follow-up emails. You start designing with placeholder content that gets overhauled when the real copy finally shows up two weeks later. You redesign sections because the client’s brand assets were not what you expected. You push back launch dates and blame “scope creep” when the real problem was bad intake.
The math is not subtle. If you spend 5 extra hours per project on asset chasing and rework, and you run 20 projects a year, that is 100 hours. At your hourly rate, that is real money you are losing to a problem that has a straightforward fix.
A structured onboarding checklist eliminates that tax. You get paid for design work, not project management overhead. Your clients get a better experience because they know exactly what to do, when to do it, and why each piece matters. And your projects start faster, run smoother, and finish closer to the original timeline.
The web designers who grow their practices and raise their rates are not always the ones with the most impressive portfolios. They are the ones whose clients say, “That was the smoothest project I have ever been part of.” That reputation compounds. It drives referrals. It justifies premium pricing.
And it starts with onboarding. Before you touch a single pixel.
Here is the complete list, condensed into something you can copy and start using today. Adjust it for your specific services and workflow.
Phase 1: Instant Welcome (Day 0)
Phase 2: Project Brief (Days 1-3)
Phase 3: Brand Assets (Days 3-7)
Phase 4: Content (Days 5-10)
Phase 5: Technical Access (Days 3-7, parallel)
If every item on this list is complete by day 10, you can start designing on day 11 with everything you need. No guessing. No chasing. No “I’ll send it this weekend” emails that turn into three-week delays.
That is what good onboarding looks like for web designers. Not complicated. Just complete.
Send one link. Clients upload docs, fill intake forms, and complete every step — automatically tracked. No account required for your clients.
Austin Spaeth is the founder of OnboardMap, a client onboarding portal for service businesses. After years of watching agencies and consultancies lose time to scattered onboarding processes, he built OnboardMap to give every client a single link with everything they need to get started.
Client onboarding portal that replaces email chaos. Send one link. Clients upload everything, complete every step, and you see progress instantly.
Start For Free