TLDR: Therapists lose potential clients between the first phone call and the first session — not because of clinical skills, but because of disorganized intake processes. Missed consent forms, forgotten questionnaires, and radio silence after scheduling create anxiety in clients who are already vulnerable. This guide walks through a structured onboarding system that handles HIPAA compliance, informed consent, insurance verification, intake assessments, and the critical emotional experience of starting therapy — so nothing falls through the cracks and clients actually show up.
A new client calls your practice. They are nervous. It probably took them weeks — maybe months — to pick up the phone. You have a good conversation. You schedule the first session for next Thursday.
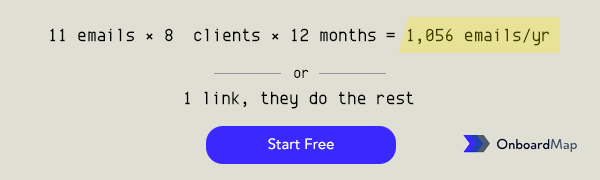
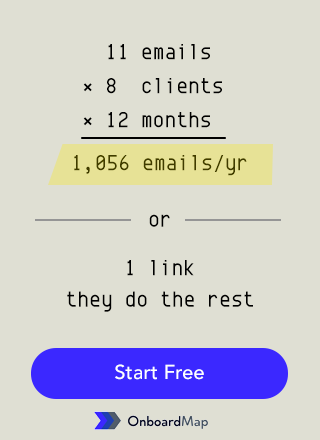
Then you send them a PDF packet. Twelve pages. Consent forms, privacy notices, a demographics questionnaire, an insurance card request, a cancellation policy, and a PHQ-9. You ask them to print it, fill it out, scan it, and email it back before the appointment.
Three days later, nothing. You send a follow-up. They respond apologetically. They have not had time. They are not sure which forms are required. They ask if they can just fill everything out when they arrive.
They show up 10 minutes early. You spend the first 20 minutes of the session on paperwork. The client is already dysregulated before you have said a word about why they called.
This is how most private practices onboard clients. And it is costing you no-shows, early dropouts, and the trust you need to do effective clinical work.
Why Therapist Onboarding Is Different From Every Other Service Business
Every service business has onboarding friction. But therapy practices face a unique combination of challenges that make it especially high-stakes:
- Emotional vulnerability — your clients are not buying a service; they are asking for help during one of the hardest periods of their life. Every interaction either builds safety or erodes it.
- HIPAA compliance — you cannot just email intake forms with PHI. You need secure transmission, proper storage, and documented consent. A Google Form does not cut it.
- Clinical pre-screening — you need to assess for safety concerns, medication history, and presenting problems before the first session, not during it.
- Insurance complexity — verification of benefits, copay communication, superbill expectations, and out-of-network explanations all need to happen before the client sits down.
- No-show risk — therapy has one of the highest no-show rates of any professional service. Studies show 20-30% of initial appointments result in no-shows. Every friction point between scheduling and attending increases that number.
A casual onboarding process does not just waste time in private practice. It can be a clinical liability, a compliance risk, and a business killer.
The Private Practice Onboarding System
Step 1: The Consultation Call (Screen Before You Schedule)
Most therapists schedule a first session and then try to figure out fit during the appointment. By then, you have already blocked time, the client has already invested emotionally, and a poor fit wastes everyone’s energy.
Run a 15-minute consultation call before scheduling. This call should cover:
- Presenting concern — what brought them to seek therapy now?
- Previous therapy experience — have they been in therapy before? What worked and what did not?
- Logistics — insurance or self-pay, preferred session times, in-person or telehealth preference
- Safety screen — any current suicidal ideation, active substance use, or crisis-level symptoms that might require a higher level of care
- Fit confirmation — based on what they have shared, are you the right clinician for their needs?
If it is a good fit, schedule the first session on the call. Do not say “I will send you some times.” Book it now. Momentum matters, especially for clients who took weeks to make this call.
Step 2: Send the Intake Portal (Not a PDF Packet)
Within one hour of the consultation call, send the client a single link to their intake portal. Not an email with six attachments. Not a link to a Google Drive folder. One link with everything they need to complete before their first session.
What the portal should include:
| Document | Why It Matters | Format |
|---|
| Informed consent for treatment | Legal requirement. Covers the nature of therapy, limits of confidentiality, and client rights. | Signature required |
| Notice of Privacy Practices (HIPAA) | Required by federal law. Client must acknowledge receipt. | Acknowledgment checkbox |
| Cancellation and no-show policy | Sets expectations and reduces no-shows by up to 30%. | Acknowledgment checkbox |
| Demographic and contact information | Name, DOB, address, emergency contact, preferred pronouns, communication preferences. | Form fields |
| Insurance card (front and back) | Needed for benefits verification. | Secure file upload |
| Photo ID | Required by many insurers and useful for telehealth identity verification. | Secure file upload |
| Clinical intake questionnaire | Presenting concerns, mental health history, family history, medical history, current medications, substance use history. | Form fields |
| Standardized assessments | PHQ-9 (depression), GAD-7 (anxiety), or other screening tools relevant to your practice. | Form fields |
| Payment information | Credit card on file for copays or self-pay fees. Reduces billing friction. | Secure payment form |
| Telehealth consent (if applicable) | Required for virtual sessions. Covers technology, privacy, and emergency protocols. | Signature required |
The key insight: the client should be able to complete all of this in one sitting, from their phone, without printing anything. If your intake process requires a printer in 2026, you are losing clients.
For guidance on making document collection frictionless, see our guide on how to collect documents from clients securely.
Step 3: Verify Insurance Before the First Session
Nothing erodes trust faster than a surprise bill. If a client thinks their insurance covers therapy and then discovers at session three that their copay is $75 instead of $20, they feel deceived — even if you did nothing wrong.
Before the first session:
- Verify active coverage and the client’s specific plan
- Confirm in-network or out-of-network status
- Check the deductible status — has it been met? How much remains?
- Confirm the copay or coinsurance amount
- Check for any prior authorization requirements
- Communicate all of this to the client in writing
Send a simple message: “I verified your insurance. Your copay for each session will be $30. Your deductible has been met. You will not owe anything beyond the copay unless your plan changes. If anything looks different on your end, let me know before our first session.”
This takes five minutes and prevents the billing conversations that cause clients to drop out of treatment.
Step 4: Send a Pre-Session Welcome Message
The day before or morning of the first session, send a brief message that does three things:
- Confirms the logistics. Date, time, location (or telehealth link). Do not make them search their email for the details.
- Normalizes the experience. “It is completely normal to feel nervous before a first session. There is no wrong way to start. We will go at your pace.”
- Sets a micro-expectation. “When you arrive, you can check in at the front desk. We will start with a brief overview of how sessions work, and then I will ask you to share a bit about what brought you in.”
This message is not operationally necessary. It is emotionally necessary. The gap between scheduling and attending is when most no-shows happen. A warm, specific message the day before reduces anxiety and increases show-up rates.
This is the same principle behind setting client expectations during onboarding — clarity reduces anxiety, and anxiety is the enemy of follow-through.
Step 5: Structure the First Session (Do Not Waste It on Paperwork)
If your intake process works, the client arrives with everything completed. You have already reviewed their questionnaire, their assessments, and their clinical history. You know their presenting concern. You know their medication list. You have a preliminary picture.
The first session should be clinical, not administrative.
- Open with a brief orientation to therapy (especially for first-timers)
- Acknowledge what they shared in their intake forms — this signals that you read everything and that their time was not wasted
- Explore their presenting concern in depth
- Collaboratively set initial treatment goals
- End with a clear plan for the next session and a discussion of session frequency
When the client leaves, they should feel heard, understood, and oriented. Not like they just filled out paperwork at the DMV.
Step 6: Automate the Follow-Through
After the first session, the onboarding is not done. The first 3-4 sessions are still “onboarding” from the client’s perspective. This is when dropout risk is highest.
Set up automated touchpoints:
- 24 hours after the first session — a brief check-in: “Thank you for coming in today. If any questions come up before our next session, do not hesitate to reach out.”
- Appointment reminders — 48 hours and 24 hours before each session for the first month.
- Incomplete intake follow-ups — if the client completed most of their portal but left one item unfinished (common with insurance cards), an automated reminder prompts them without you having to write an email.
- Feedback request after session 3-4 — “How is the process feeling so far? Is there anything I can do differently?” This catches issues before they become reasons to quit.
For more on designing follow-up sequences, see our client onboarding email sequence templates and the guide on how to collect onboarding feedback from clients.
The No-Show Problem: Why Onboarding Is the Fix
Let’s talk about the number that keeps private practice owners up at night: the no-show rate for first sessions averages 20-30% across the mental health field.
That is not just lost revenue. It is a blocked time slot that could have gone to someone on your waitlist. It is a client who needed help and did not get it.
The research on reducing therapy no-shows points to three interventions — and all of them are onboarding fixes:
| Intervention | Impact on No-Show Rate | Onboarding Connection |
|---|
| Pre-session phone contact | Reduces no-shows by 25-30% | The consultation call (Step 1) |
| Appointment reminders (multiple) | Reduces no-shows by 30-40% | Automated follow-through (Step 6) |
| Reducing intake barriers | Reduces no-shows by 15-25% | Digital portal vs. PDF packet (Step 2) |
A client who has completed their intake forms, received an insurance verification, gotten a pre-session message, and already invested 20 minutes in their portal is dramatically less likely to no-show than a client who received one confirmation email and a packet of PDFs.
This is the same psychology we discuss in why clients go silent during onboarding — friction creates avoidance, and avoidance becomes abandonment. Removing friction before the first session is the single most effective anti-no-show strategy.
HIPAA Compliance: What Your Intake Process Must Get Right
This is not optional. HIPAA violations in private practice can result in fines of $100 to $50,000 per violation, with a maximum of $1.5 million per year for repeated violations. More practically, a breach destroys the trust that is foundational to therapeutic work.
Your onboarding process must:
- Transmit PHI securely. Email is not secure by default. If clients are emailing you intake forms with mental health history, medication lists, or insurance information, you are at risk. Use a portal with encryption or a HIPAA-compliant form tool.
- Store documents securely. Client documents should be stored in encrypted, access-controlled storage — not in your Gmail attachments folder.
- Obtain written acknowledgment of privacy practices. The client must acknowledge receipt of your Notice of Privacy Practices. This should be documented and stored.
- Maintain a Business Associate Agreement (BAA). Any third-party tool that touches PHI — your EHR, your form builder, your file storage — must have a signed BAA with your practice.
- Document consent for telehealth. If you offer virtual sessions, you need separate consent covering the technology platform, privacy risks, and emergency protocols.
The safest approach is to keep everything in one secure system. The more tools you use, the more BAAs you need, and the more places PHI can leak.
For more on secure document handling, see secure file upload for client onboarding and how to collect documents from clients securely.
The Group Practice Challenge: Scaling Onboarding Across Multiple Clinicians
If you are a solo practitioner, your onboarding process lives in your head (which is a problem, but a manageable one). If you run a group practice, the challenge compounds.
Common group practice onboarding failures:
- Each clinician has their own intake forms and processes, creating an inconsistent client experience
- New clinicians are not trained on the intake process, leading to missed consent forms or incomplete documentation
- Insurance verification falls through the cracks when it is “someone’s job” but no one’s system
- Clients who are waitlisted and then matched with a clinician experience a second gap — the original momentum from their intake call is gone
The fix: Standardize intake across the practice. Every client goes through the same portal, completes the same baseline forms, and receives the same automated touchpoints. Clinician-specific questionnaires (like specialty assessments) can be added as modules, but the core process should be identical.
This is exactly what a client onboarding SOP is designed for — documenting the process once and running it consistently, regardless of who is delivering the service.
For practices onboarding multiple clients simultaneously (especially during “new year, new therapist” season in January), see our guide on how to onboard multiple clients at once.
The Therapist Onboarding Checklist
Here is a complete checklist you can implement starting with your next client:
Before the first session:
After the first session:
After session 3-4:
For more industry-specific checklists, see our client onboarding checklist for service businesses and our free onboarding checklist packs.
What Happens When You Get This Right
When a therapist’s onboarding is seamless, the clinical impact is tangible:
- Clients show up. No-show rates drop because the client has already invested time, received confirmation, and feels expected — not forgotten.
- First sessions are productive. You are not spending 20 minutes on consent forms. You are doing therapy.
- Trust forms faster. The client’s first experience with you was organized, respectful of their time, and clear. That sets the tone for the therapeutic relationship.
- Compliance is automatic. Consent forms, HIPAA acknowledgments, and insurance verifications are documented and stored — not scattered across email threads and paper files.
- You spend less time on admin. Automated reminders, digital forms, and centralized document storage free up hours per week that you can spend on clinical work — or on yourself.
The irony of private practice is that therapists spend years learning to create safe, structured environments for healing — and then onboard clients through a process that is chaotic, confusing, and anxiety-inducing.
Your onboarding is the first therapeutic intervention. Make it feel like one.
Start Building Your Intake System
You do not need to overhaul everything overnight. Start with one change: replace the PDF packet with a digital portal. Give clients one link where they can complete everything from their phone. Add automated reminders so you stop writing follow-up emails. Use secure file uploads so you stop receiving insurance cards over unencrypted email.
OnboardMap was built for exactly this. Branded portals, secure document collection, automated reminders, no client login required. One link. Everything in one place. HIPAA-friendly by design.
Your clients already trust you with their mental health. Show them they can trust your process too.
Get early access to OnboardMap →