TLDR: Interior design and architecture projects fail not because of bad design, but because of bad beginnings. Unclear budgets, missing site measurements, vague aesthetic preferences, and undefined decision-making authority create scope creep, revision spirals, and client frustration before the first concept is even presented. This guide walks through a structured onboarding process covering design briefs, budget alignment, inspiration collection, document gathering, and stakeholder management , so your creative work starts from a foundation of clarity, not chaos.
You just signed a new residential client. They are thrilled. They have been saving Pinterest boards for two years. They want their home to feel “warm but modern, minimal but not cold, timeless but not boring.”
You ask for their budget. They say “flexible.” You ask for their timeline. They say “no rush, but we would love it done before the holidays.” You ask who is making decisions. They say “we both are” , gesturing vaguely at their partner who has not said a word.
Six months from now, the project is three months behind schedule. The client has rejected two concept presentations because “it just does not feel right.” The budget conversation you should have had on day one is now an argument about a $14,000 sofa.
This is not a design problem. It is an onboarding problem.
Why Design Project Onboarding Is Uniquely Challenging
Interior designers and architects face onboarding challenges that are fundamentally different from other service businesses:
Aesthetic subjectivity , “I want it to feel like a boutique hotel” means something different to every client. If you do not pin down the aesthetic with precision during intake, you design blind.
Budget avoidance , clients in this space are notoriously reluctant to share real budgets. They either understate to negotiate or refuse to commit. Without a number, you cannot design responsibly.
Multi-stakeholder decisions , couples, families, business partners. The person who hired you is often not the only decision-maker. Undiscovered stakeholders surface mid-project and torpedo approved concepts.
Heavy documentation , floor plans, site photos, existing furniture inventories, building codes, HOA restrictions, contractor bids. The documentation requirement rivals legal and financial services.
Long project timelines , a kitchen renovation takes months. A new build takes years. The onboarding sets the tone for a relationship that will span hundreds of touchpoints.
A Pinterest board and a handshake is not onboarding. Here is what is.
The Interior Design and Architecture Onboarding Playbook
Step 1: The Discovery Call (Qualify Before You Commit)
Before you send a proposal, before you sign a contract, run a structured discovery call. This is not a sales pitch , it is a compatibility assessment.
The discovery call should answer:
What is the scope? Single room, full home, commercial space, new construction, renovation?
What is the realistic timeline? Is there a hard deadline (event, lease, baby due date)?
What is the budget range? Not a specific number yet , a range. “Are we working with $50K, $150K, or $500K?” You need to know the ballpark before you scope the project.
Who makes decisions? Get every decision-maker identified now. If someone’s partner, investor, or business partner needs to approve concepts, you need to know before you start designing.
Have they worked with a designer/architect before? If yes, what worked and what did not? If no, they need more education about the process.
What is their communication style? Do they want weekly updates? Do they prefer email or phone? How involved do they want to be in the process?
Red flag identification: The discovery call is also where you screen for projects that will become nightmares. If a client will not discuss budget at all, if there is a hidden decision-maker, or if the timeline is unrealistic given the scope , address it now or decline the project.
Step 2: Send the Design Brief Questionnaire (Immediately After Signing)
The moment the contract is signed, send the client a single portal link with a comprehensive design brief questionnaire. This replaces the scattered emails, the shared Pinterest boards, and the “I will just bring some ideas to our first meeting” approach.
Storage pain points , what is there too much of, what needs a home
Accessibility needs , current or anticipated
Aesthetic Preferences
Reference images , “Upload 10-15 images of spaces you love. For each one, tell us specifically what you like about it.” This is more useful than “modern farmhouse.”
Materials and textures they are drawn to (wood, metal, stone, fabric types)
Colors they love and colors they refuse to live with
Specific pieces they already own and want to keep
Specific pieces they want to replace
Budget Parameters
Total project budget (with a clear explanation that this includes design fees, materials, furnishings, labor, and contingency)
Priority allocation , “If we had to cut 20% from the budget, which room or element is most important to protect?”
Furnishings budget versus construction/renovation budget (if applicable)
Are there any major purchases they plan to make independently (appliances, art)?
Decision-Making and Approval Process
Who needs to approve concepts? List every person by name.
What is their preferred review format (in-person presentation, digital walkthrough, mood board)?
What is their expected turnaround time for feedback?
Is there a point person for day-to-day questions during construction/installation?
Design without documentation is guesswork. Before you start concepting, you need the physical reality of the space.
Residential projects:
Document
Source
Format
Floor plans (as-built)
Client, builder, or county records
PDF or CAD file
Site photos (every room, every angle, natural light at different times)
Client or site visit
Photo upload
Existing furniture inventory (what stays, what goes)
Client
List with photos
HOA restrictions or covenants
Client
PDF upload
Paint colors currently in use
Client
Photos or swatches
Contractor bids (if renovation)
Client or contractors
PDF upload
Utility locations and specifications (for kitchen/bath)
Client or plumber/electrician
Photos or diagrams
Commercial projects:
Document
Source
Format
Lease agreement (for tenant improvements)
Client
PDF upload
Building code compliance requirements
Client or building management
PDF
ADA compliance requirements
Code research
Reference documents
Existing MEP drawings
Building owner/engineer
CAD files
Brand guidelines (for branded spaces)
Client marketing team
PDF with assets
Employee headcount and growth projections
Client
Data form
IT and AV requirements
Client IT team
Specification document
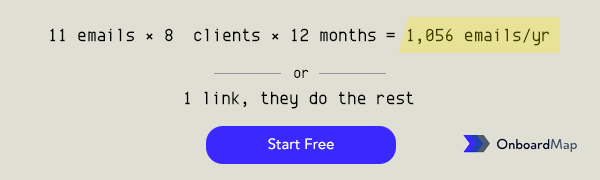
A client onboarding portal is particularly valuable here because design projects require a mix of forms, file uploads, and ongoing documentation. Sending seven separate emails asking for different files is how things get lost. One portal with a clear checklist keeps everything organized.
This is the meeting most designers dread , and the one that prevents 80% of project problems.
After the client completes their design brief and you have reviewed their requirements, schedule a dedicated budget conversation. Not folded into the kickoff call. Not glossed over in an email. A separate, focused conversation about money.
What to cover:
Present a realistic budget framework. Based on their scope and requirements, show them what their budget can and cannot achieve. Use ranges: “A kitchen renovation at this scope typically runs $85K-$120K. Your budget of $70K means we will need to make trade-offs. Let’s decide together where to invest and where to save.”
Establish the contingency. Design projects always encounter surprises , especially renovations. Establish a 10-20% contingency fund upfront. A client who learns about contingencies at signing is prepared. A client who learns about them when costs overrun is furious.
Define the change order process. When the client wants to upgrade a countertop material mid-project, what happens? Establish the process now: written change order, cost impact communicated, client approval required before proceeding. This prevents the “I thought that was included” conversations.
Get sign-off. Document the agreed budget breakdown and have the client sign it. This protects you and creates accountability.
Step 5: Run the Design Kickoff (With All Stakeholders Present)
The kickoff meeting should include every person who will approve concepts. If a client’s spouse cannot attend the kickoff, reschedule. Presenting to half the decision-making team and then re-presenting when the other half has concerns is a waste of your time and theirs.
The kickoff should cover:
Review the design brief together. Walk through what they submitted. Clarify vague answers. Push on aesthetics , if they said “warm but modern,” show them three different interpretations and ask which one resonates.
Walk through the project timeline. Schematic design → design development → documentation → procurement → installation. Show them what happens at each phase, how long it takes, and where their input is needed.
Set the feedback cadence. “I will present concepts on [date]. You will have 5 business days to provide consolidated feedback from all stakeholders. Consolidated , meaning one set of notes, not conflicting emails from different people.”
Establish communication norms. One point of contact. One channel. All changes documented in writing.
Schedule the next milestone. Do not leave the kickoff without the next meeting date on the calendar.
This is your quick win. Within one week of the kickoff, deliver a mood board or initial concept direction. Not a full design. A curated visual representation of the direction based on everything you learned during onboarding.
Why this matters:
It proves you were listening. The client sees their preferences reflected in your creative direction.
It surfaces misalignment early. If the mood board misses the mark, you course-correct at the concept stage , not after you have ordered $30K in custom furniture.
It creates excitement. The client has spent weeks on paperwork and meetings. The mood board is the first moment that feels like “the fun part” is starting.
This is the same quick-win principle we discuss in the sales-to-service handoff , early value delivery builds trust and momentum.
The Revision Spiral: How Bad Onboarding Becomes Bad Design
The most expensive outcome of poor onboarding in design is the revision spiral: the client rejects a concept, you revise, they reject again, you revise again, and the project stalls.
Revision spirals almost always trace back to onboarding failures:
Revision trigger
Root cause
Onboarding fix
“This is not what I pictured”
Vague aesthetic brief
Pin down aesthetics with specific reference images and forced-choice questions
“We love it but my partner does not”
Hidden stakeholder
Identify all decision-makers at discovery, require all at kickoff
“This is over budget”
Budget avoidance during intake
Dedicated budget alignment meeting with signed acknowledgment
“Can we start over?”
Misaligned expectations about scope
Written scope summary with client sign-off before design begins
“It is just not right” (no specific feedback)
Client has not developed design vocabulary
Use onboarding to educate , show them how to give useful feedback
Every revision round costs you 10-20 hours of design time. Two preventable revision rounds on a mid-size project can erase your entire profit margin. The onboarding work that prevents revisions costs 2-3 hours upfront.
If you are a solo designer managing 3-5 projects at a time, a structured intake questionnaire and a consistent kickoff process will transform your practice. If you are a firm with multiple designers handling 15-30 concurrent projects, you need a system.
What scales, what does not:
Approach
Solo designer
Multi-designer firm
Ad hoc emails and shared Pinterest boards
Barely manageable
Total chaos
Templated intake form + standardized kickoff agenda
Efficient and consistent
Works with minor customization
Branded client portal with automated reminders
Professional and scalable
Essential for consistency across designers
The difference between a designer who earns $80K and one who earns $300K is rarely talent. It is systems. A designer with a structured onboarding process takes on more projects, spends less time on revisions, and delivers faster , because every project starts from clarity.
The best interior designers and architects do not just create beautiful spaces. They create beautiful processes. And that process starts the moment the contract is signed.
Stop accepting vague briefs. Stop avoiding budget conversations. Stop presenting concepts to half the decision-making team. Build an onboarding system that collects everything you need, sets every expectation, and gives your creative work the foundation it deserves.
OnboardMap gives you the infrastructure. Branded portals where clients complete design briefs, upload site photos, acknowledge budgets, and track their onboarding progress , all from one link. Automated reminders so you stop chasing floor plans over email. A dashboard so your whole team sees what is done and what is still outstanding.
Your design work is exceptional. Make sure your clients know that from the very first interaction.
Austin Spaeth is the founder of OnboardMap, a client onboarding portal for service businesses. After years of watching agencies and consultancies lose time to scattered onboarding processes, he built OnboardMap to give every client a single link with everything they need to get started.
OnboardMap
Client onboarding portal that replaces email chaos. Send one link. Clients upload everything, complete every step, and you see progress instantly.