TLDR: When an MSP misses something during onboarding — an undocumented admin account, a forgotten server, an incomplete backup — the consequences are security breaches and 2 AM outages. This guide covers the full MSP onboarding process from documentation collection and network discovery through stack deployment and ongoing communication setup.
You just signed a 50-seat company. They’re switching from their old IT guy who “handled everything” and kept all the passwords in his head.
Now it’s your problem.
MSP onboarding isn’t just about making a good first impression. It’s about security, compliance, and getting full visibility into an environment you didn’t build. Miss something during onboarding and you’ll be dealing with the fallout for months.
Here’s how to get it right.
Why MSP Onboarding Is High Stakes
Most service businesses can recover from a sloppy onboarding. An agency can catch up on brand assets. An accountant can request a missing form.
But when an MSP misses something during onboarding, the consequences are different:
- Security gaps — an undocumented admin account becomes a breach vector
- Missed devices — a forgotten server doesn’t get patched and goes down at 2 AM
- Incomplete backups — you assume everything is covered until disaster recovery proves otherwise
- Scope creep — without a clear baseline, clients expect you to manage things that were never in the agreement
Your onboarding process isn’t just a workflow. It’s your first line of defense.
The MSP Client Onboarding Process
Step 1: Collect Documentation Before You Touch Anything
Before you run a single scan or log into a single device, you need to collect everything the client has on their current environment. This means:
- Network diagrams (if they exist — they usually don’t)
- Hardware inventory — servers, workstations, switches, firewalls, printers, access points
- Software inventory — line-of-business applications, licensing information, SaaS subscriptions
- Credential inventory — admin passwords, vendor portals, ISP account info, domain registrar
- Vendor contacts — current ISP, phone provider, copier company, software vendors
- Existing contracts — warranties, support agreements, licensing renewals
Use a secure file upload portal for this. Credentials and network documentation should never travel over plain email.
Step 2: Run a Network Discovery and Audit
Once you have the client’s documentation (or lack thereof), run your own discovery. Compare what they told you exists against what actually exists.
Your audit should cover:
- Network topology — subnets, VLANs, routing, DNS, DHCP
- Device inventory — every device on the network, including ones nobody mentioned
- User accounts — Active Directory or cloud identity, including stale and orphaned accounts
- Security posture — firewall rules, endpoint protection status, patch levels, MFA status
- Backup status — what’s backed up, what isn’t, when the last successful backup ran
- Compliance gaps — depending on the client’s industry (HIPAA, PCI, CMMC)
Document every finding. This becomes your baseline and your proof of what the environment looked like when you took over.
Step 3: Build the Onboarding Packet
After discovery, package everything into a structured onboarding handoff:
- Findings report — what you discovered, what’s at risk, what needs immediate attention
- Recommended remediation plan — prioritized by severity
- Service scope confirmation — exactly what’s covered under your agreement and what’s out of scope
- Escalation procedures — how the client contacts you, expected response times by severity level
- Monitoring and alerting setup — what you’re watching, how you’ll communicate issues
Walk through this with the client in a formal onboarding review meeting. Don’t just send a PDF. Sit down (or jump on a call) and go through it together.
Step 4: Deploy Your Stack
With documentation and scope confirmed, deploy your tools:
- RMM agent on all managed endpoints
- Backup solution configured and first backup verified
- Endpoint protection deployed and reporting
- Monitoring and alerting configured
- Documentation platform updated (ITGlue, Hudu, or whatever you use)
- Password manager provisioned for the client
Verify every deployment. Don’t assume the RMM agent installed successfully on all 50 machines. Check. The one you miss will be the one that gets ransomware.
Step 5: Establish Ongoing Communication
MSP relationships live and die by communication. During onboarding, establish:
- Primary contact on the client side (and a backup)
- Regular review cadence — monthly or quarterly business reviews
- Ticket submission process — how users request help
- Emergency procedures — who to call after hours and how
This is also covered in a broader context in the client onboarding checklist for service businesses, which applies to the communication and expectation-setting side of things.
The MSP Onboarding Checklist
Stop Losing Time to Disorganized Handoffs
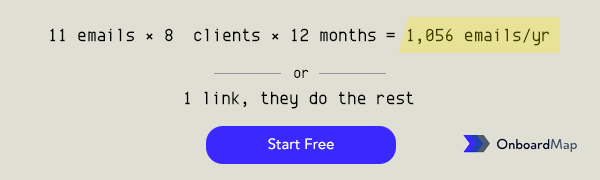
The biggest time sink in MSP onboarding is chasing clients for information they should have sent you weeks ago. Credentials trickle in over email. Vendor contacts arrive one at a time. You ask for the ISP account number three times before someone finds it.
Structure eliminates this. When clients have one place to upload everything, one checklist showing what’s missing, and automated reminders nudging them forward — you get what you need faster and start protecting their environment sooner.
OnboardMap helps MSPs collect client documentation, track onboarding progress across multiple clients, and automate follow-ups — so you can focus on the technical work, not the paperwork.
Get early access and streamline your MSP onboarding process.